Audit Square SCANNER
What is “Audit Square Scanner”?
Audit Square Scanner is one of the options how you use Audit Square solution:
- The scanner is intended for remote assessment of multiple computer at once.
- In order to assess a computer remotely with scanner you need Local Administrator privileges on target computer.
- The scanner is especially handy in MS domain environment but you can scan also standalone computers providing they are remotely accessible over network.
- The Agent is distributed either as Portable ZIP package or MSI installer package.
How to get it?
Audit Square Scanner is available for download form Audit Square Portal:
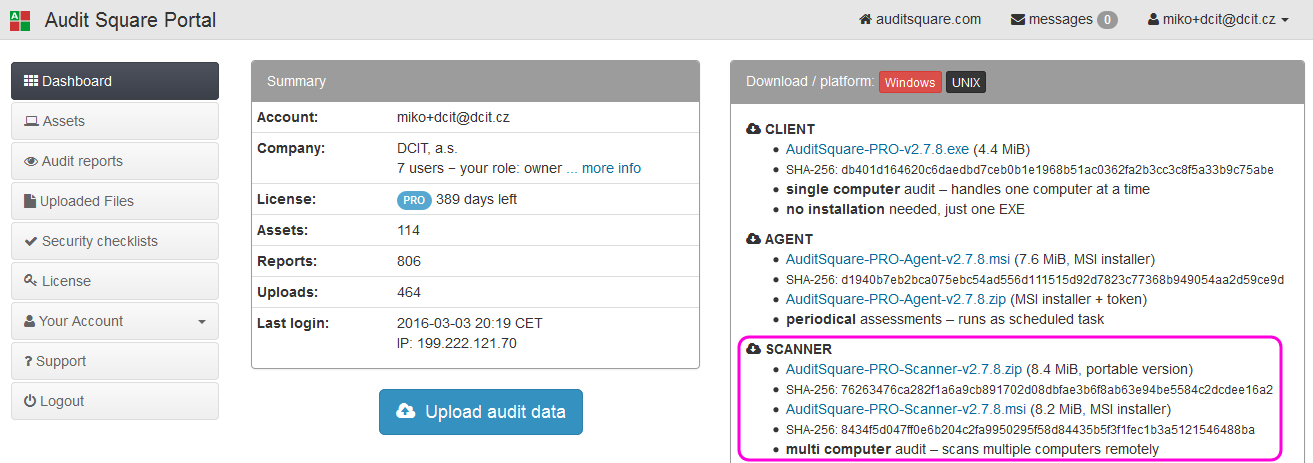
There are two options how you can download the Agent:
Portable ZIP package - this option is good if you are doing a one-time audit (either as external or internal consultant), simply unzip and start
AuditSquare-Scanner.exeMSI installer - intended for internal auditors and/or internal IT security specialists, it is usually installed on auditor's desktop (or management server).
Technical background
The Scanner:
- supports Windows 2000, 2003, 2008(R2), 2012(R2), XP, 7, Vista, 8.x, 10 (x86, x86_64)
- requires approx. 20MB disk space + 100-200MB temporary space when it is running
Although it is called a scanner it does not utilize techniques like port scanning or vulnerability scanning. Instead it connects to the target computers, puts there a small collecting ephemeral-agent which is started on the target computer. Once the data collection is finished the scanner gets back collected data and cleans after itself.
After the scanner gets data from all scanned computers there are two options:
- you can upload data to Audit Square portal (either cloud or on-premise depending on your licence) for report processing
- or you can just get the data (
*.rsafile locally stored on the computer where the scanner is running) and upload them later via web browser to the portal for processing.
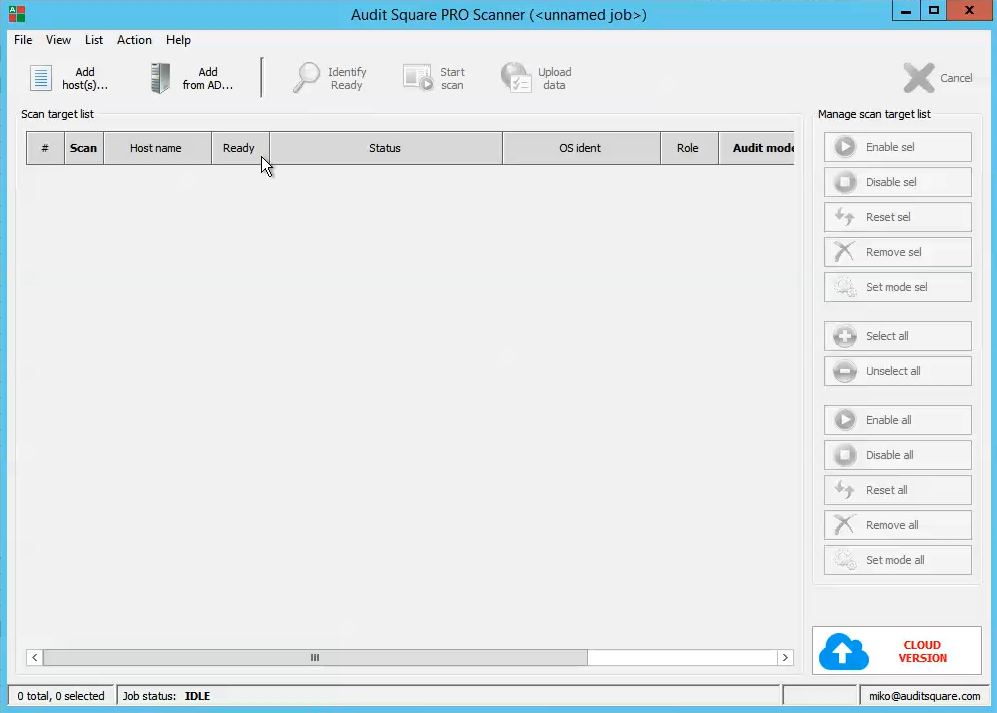
Scanner step by step
When you start the scanner for the first time you will see an empty job like this:
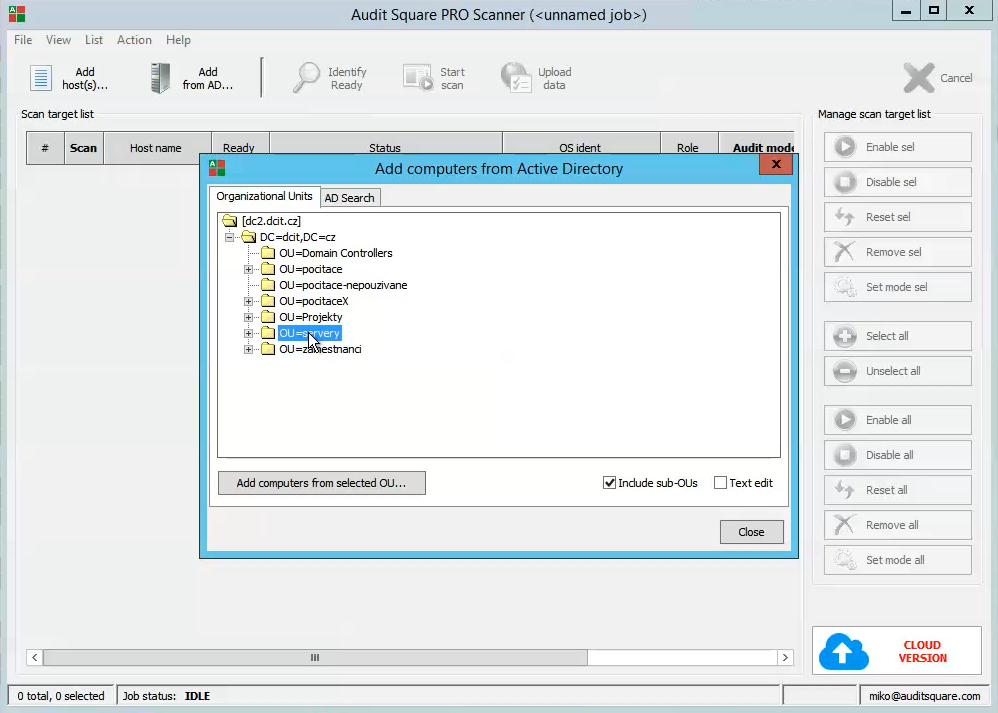
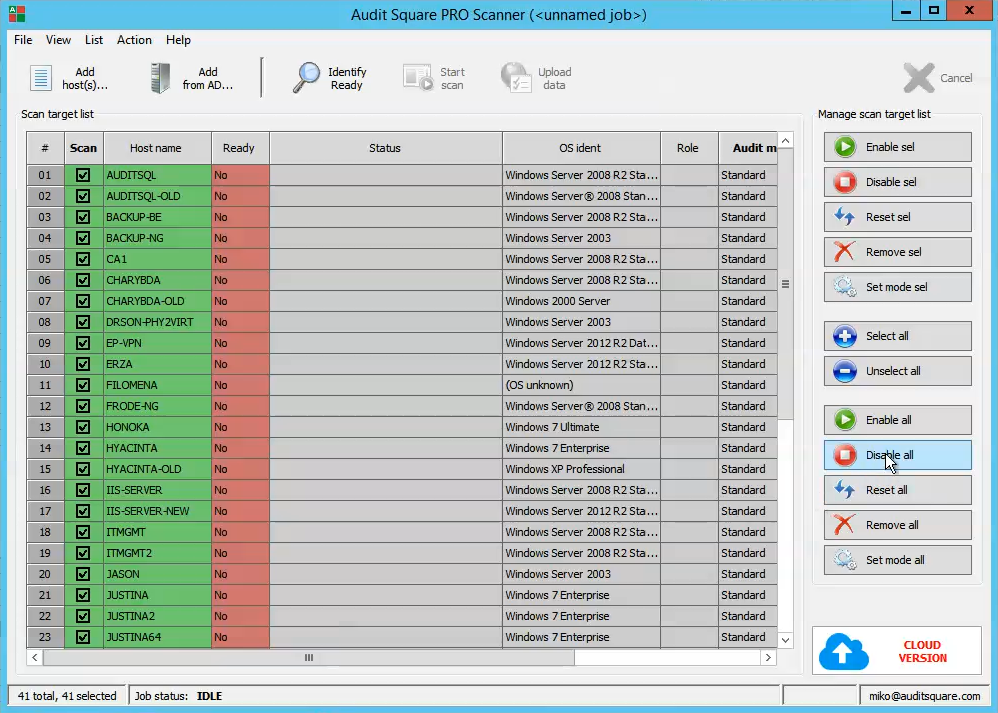
To add scanned computers you have basically two options:
click Add host(s).. button and type (or paste) Windows names of target computers
or click Add from AD.. then you can choose computers (or whole OUs) from Active Directory
You should see added computers like on the following picture:
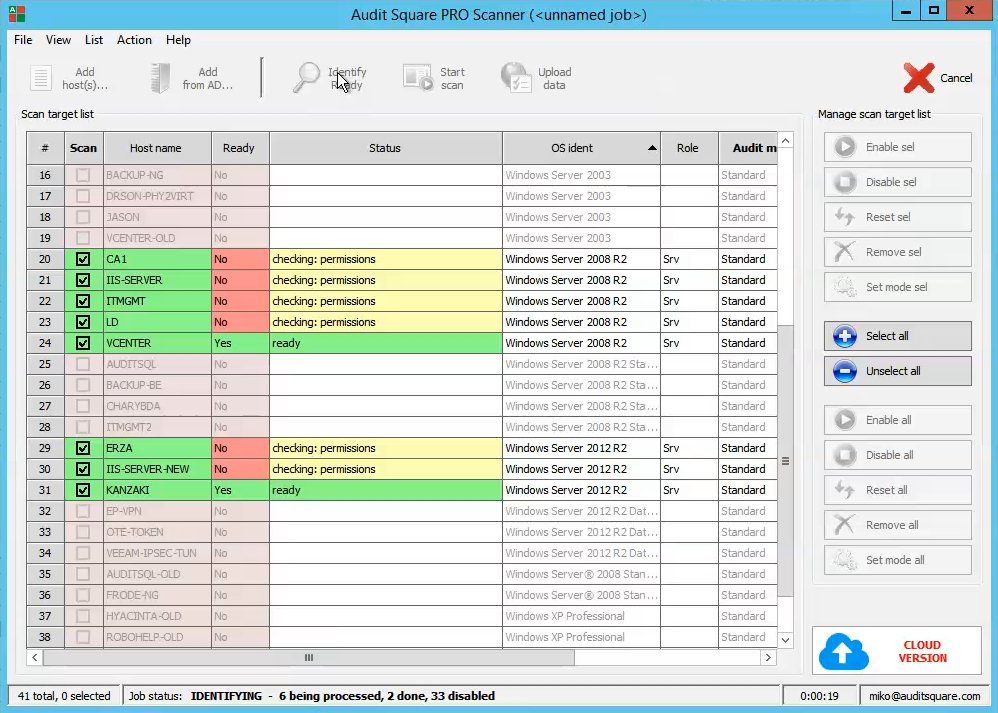
The actual scan has two phases:
identify which computers from defined list are ready (you can connect + you have admin permissions)
the scan
First click the button Identify (this phase should be pretty fast, usually <1min)
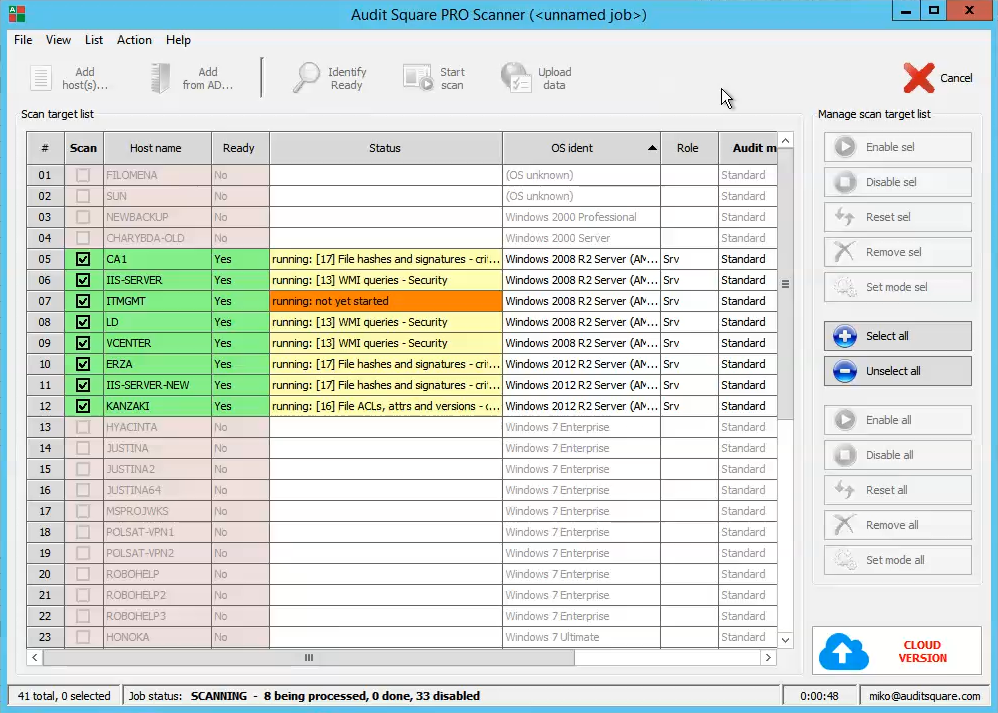
Next click the button Start scan - the scanning runs in parallel and on most of the computers it should finish within 5-10 minutes.
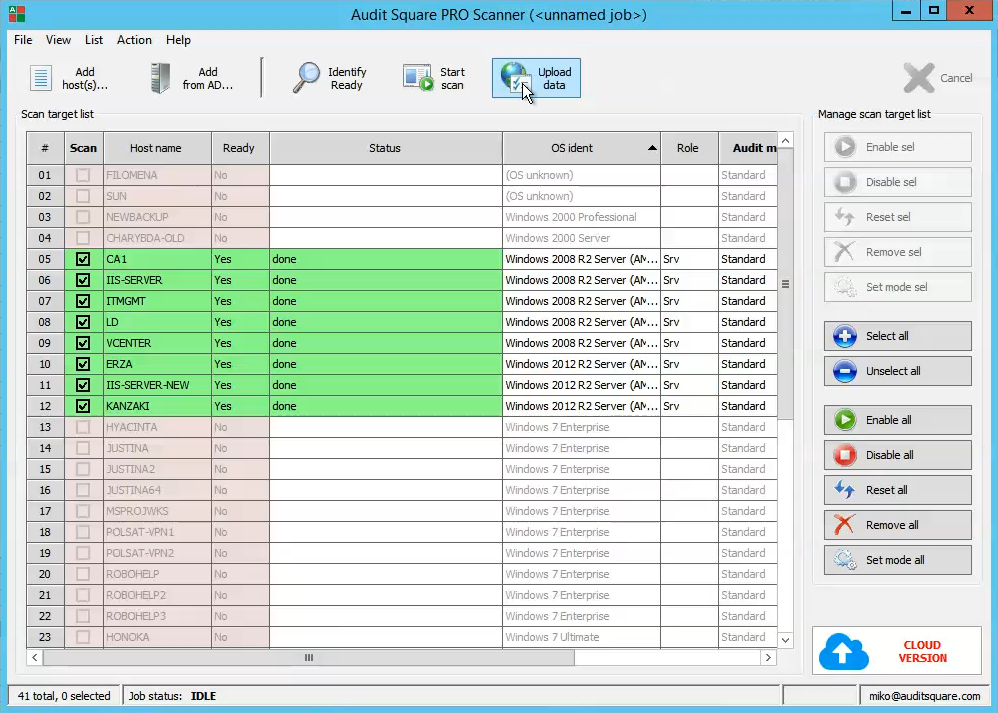
After scanning finished on all computers you have all collected data locally (on the computer where you run scanner) and these data should be uploaded to the portal for urther processing.
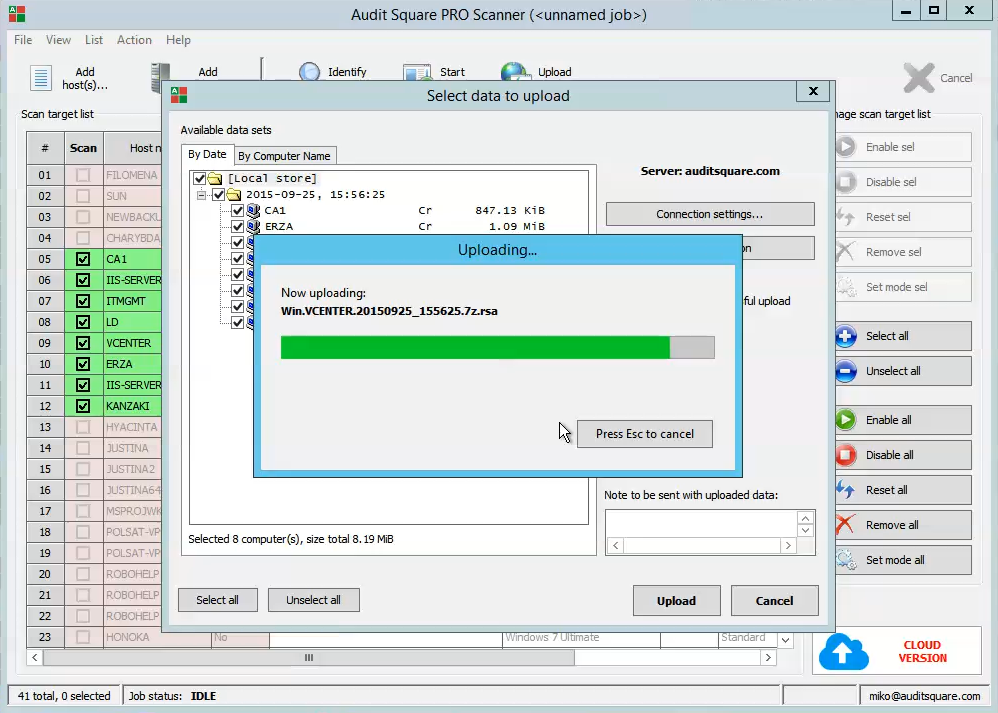
The easiest way is via Upload data button:
Before the upload starts you will be asked for authentication with your Audit Square account.
Once you have uploaded the data you can see them on web portal:
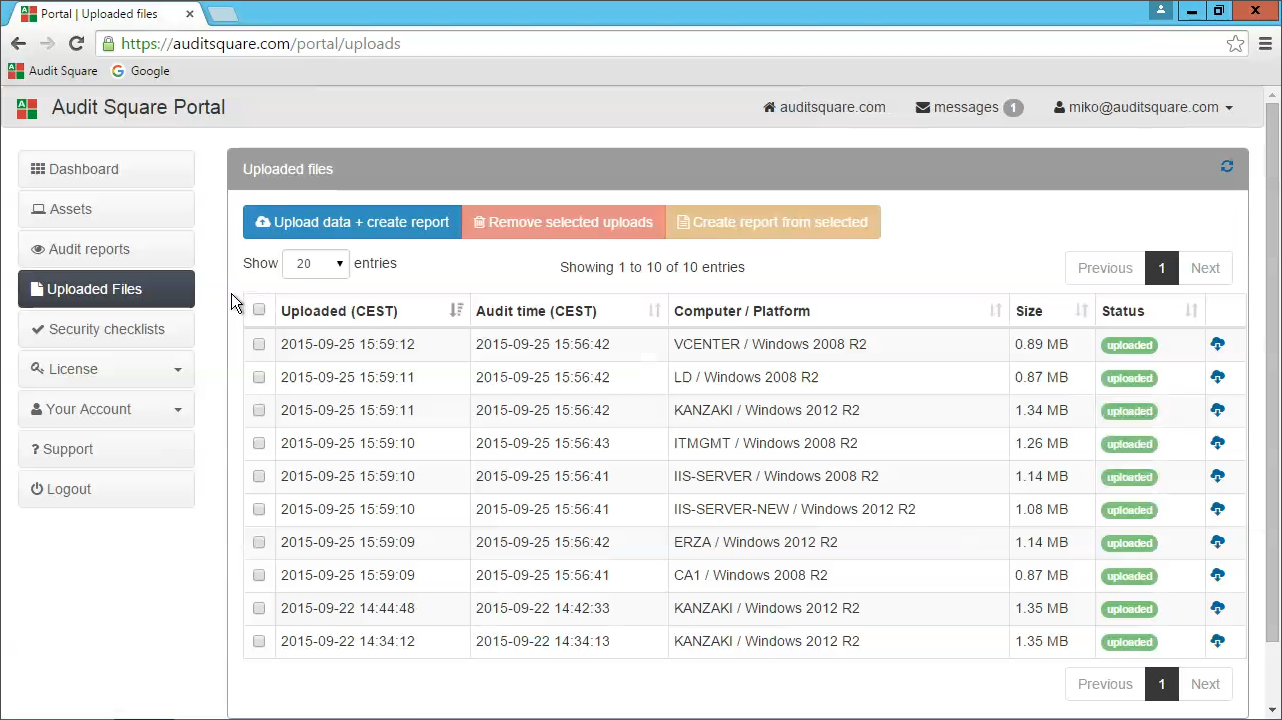
You can also see that immediately after upload the report processing has started:
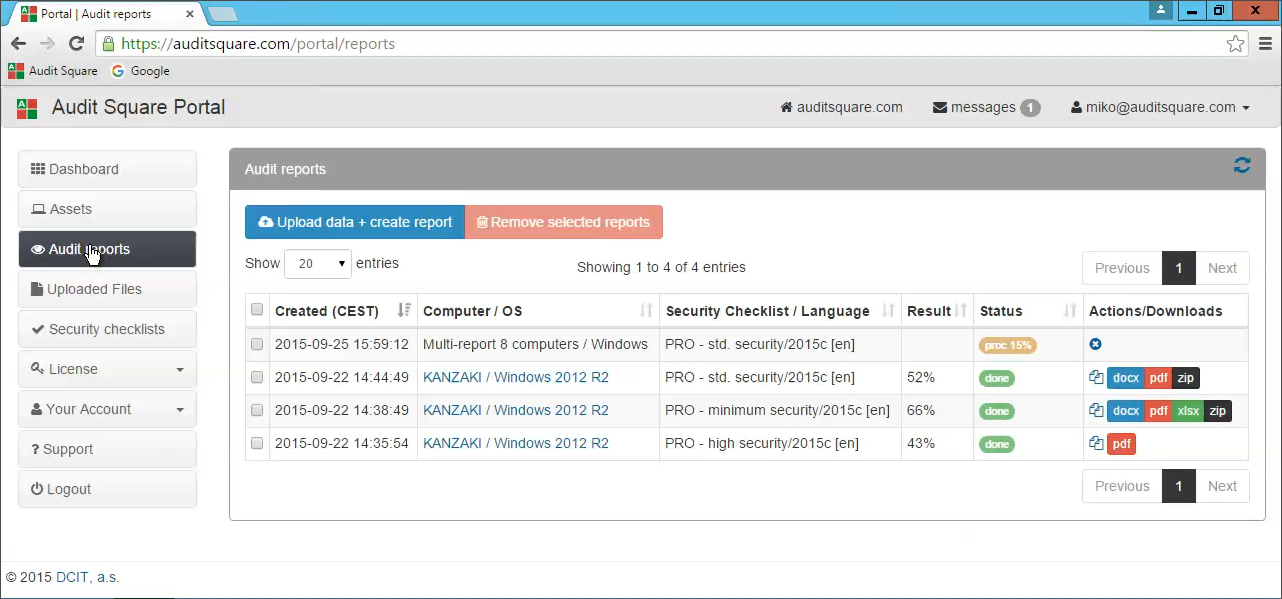
On the portal you can create different (single computer or multi-computer) reports from the data once uploaded from the scanner - no need to run the scan again for each new report.
Batch mode
Open the scanner, create a scanning job, go to menu - File - Save current job as.. and choose e.g. C:\sw\asq-scanner\testjob.sess
Then you can run the scan from a command line like this:
C:\sw\asq-scanner\AuditSquare-Scanner-cli.exe /sess=C:\sw\asq-scanner\testjob.sess /batch=scan
or
C:\sw\asq-scanner\AuditSquare-Scanner-cli.exe /sess=C:\sw\asq-scanner\testjob.sess /batch=scan,upload
The former command will only do scanning, whereas the latter one will upload the data to portal as well.
Things to consider:
Scanner's CLI version (
AuditSquare-Scanner-cli.exe) has to be run under the same account as GUI version used to save the job file.sess.No interactive authentication is possible during the command-line scanning, hence the account used to run the command has to be privileged enough to perform the scan.
Job file (
.sess) is not modified in any way during the command-line scanning. This behaviour is intended to allow the repeated scans (e.g. via scheduled task), but may lead to undesired effects when CLI and interactive GUI versions are used interchangeably.